| Partial Differential Equation Toolbox | |
Examples of Elliptic Problems
This section describes the solution of some elliptic PDE problems. The last problem, a minimal surface problem, is nonlinear and illustrates the use of the nonlinear solver. The problems are solved using both the graphical user interface and the command-line functions of the PDE Toolbox. The topics in include
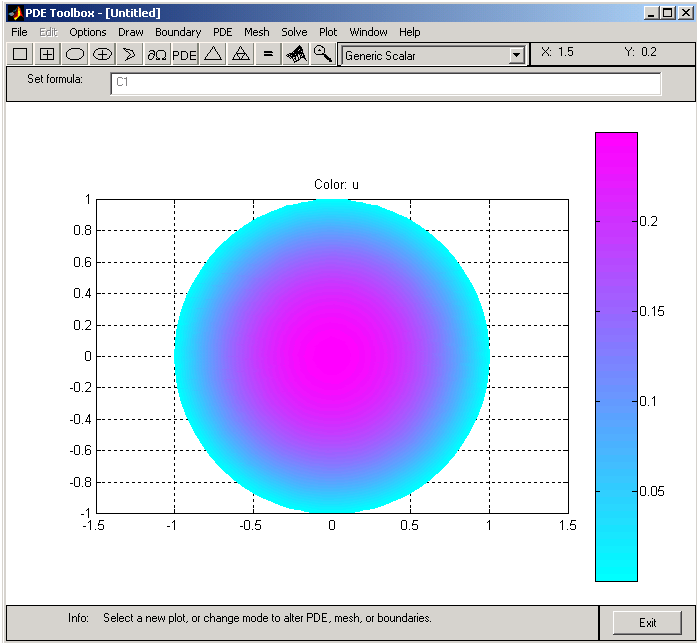
Poisson's Equation on Unit Disk
As a first example of an elliptic problem, let us use the simplest elliptic PDE of all -- Poisson's equation.
 U = 1 in
  , U = 0 on
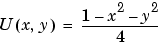
where is the unit disk. In this case, the exact solution is
so the error of the numeric solution can be evaluated for different meshes.
Using the Graphical User Interface
With the pdetool graphical user interface (GUI) started, perform the following steps using the Generic Scalar mode:
 icon. The boundaries of the decomposed geometry are plotted, and the outer boundaries are assigned a default boundary condition (Dirichlet boundary condition, u = 0 on the boundary). In this case, this is what we want. If the boundary condition is different, double-click the boundary to open a dialog box through which you can enter and display the boundary condition.
c, a, and f. In this simple case, they are all constants: c = 1, f = 1, and a = 0.
button or select Initialize Mesh from the Mesh menu. This initializes and displays a triangular mesh.
u-(1-x.^2-y.^2)/4 in the user entry edit field. You obtain a plot of the absolute error in the solution.
You can also compare the numerical solution to the exact solution by entering some simple command-line-oriented commands (see the next section). It is easy to export the mesh data and the solution to the MATLAB main workspace by using the Export . . . options from the Mesh and Solve menus. To refine the mesh and solve the PDE successively, simply click the refine and = buttons until the desired accuracy is achieved. (Another possibility is to use the adaptive solver.)
Using Command-Line Functions
First you must create a MATLAB function that parameterizes the 2-D geometry -- in this case a unit circle.
The M-file circleg.m returns the coordinates of points on the unit circle's boundary. The file conforms to the file format described on the reference page for pdegeom. You can display the M-file by typing type circleg.
Also, you need a function that describes the boundary condition. This is a Dirichlet boundary condition where u = 0 on the boundary. The M-file circleb1.m provides the boundary condition. The file conforms to the file format described on the reference page for pdebound. You can display the M-file by typing type circleb1.
Now you can start working from the MATLAB command line:
[p,e,t]=initmesh('circleg','Hmax',1);
error=[]; err=1;
while err > 0.001,
    [p,e,t]=refinemesh('circleg',p,e,t);
    u=assempde('circleb1',p,e,t,1,0,1);
    exact=-(p(1,:).^2+p(2,:).^2-1)/4;
    err=norm(u-exact',inf);
    error=[error err];
   end
pdemesh(p,e,t)
pdesurf(p,t,u)
pdesurf(p,t,u-exact')
The first MATLAB command creates the initial mesh using the parameterizing function circleg.
Also, initialize a vector error for the maximum norm errors of the successive solutions and set the initial error err to 1. The loop then runs until the error of the solution is smaller than 10-3.
circleg, the point matrix p, the edge matrix e, and the triangle matrix t, is refined, and the mesh is returned using the same matrix variables.
circleb1 contains a description of the boundary conditions, and p, e, and t define the triangular mesh.
exact contains the exact solution at the nodes. Note that what you actually find is the max-norm error of the solution at the nodes.
pdesurf as third argument can take any vector of values on the mesh given by p and t, not just the solution. In this case you are also plotting the error function.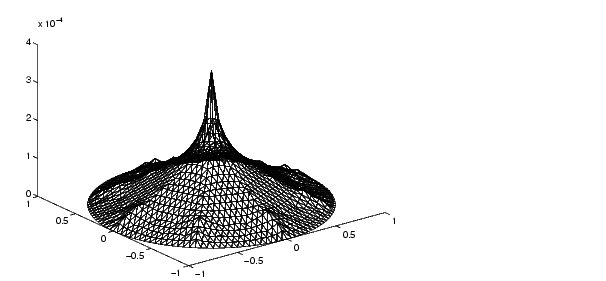
pdedemo1 performs all the above steps.
| | Examples | A Scattering Problem | |