| Fuzzy Logic Toolbox | |
ANFIS Editor GUI Example 1: Checking Data Helps Model Validation
In this section we look at an example that loads similar training and checking data sets, only the checking data set is corrupted by noise.
Loading Data
To work both of the following examples, you load the training data sets (fuzex1trnData and fuzex2trnData) and the checking data sets (fuzex1chkData and fuzex2chkData), into the ANFIS Editor GUI from the workspace. You may also substitute your own data sets.
To load these data sets from the directory fuzzydemos into the MATLAB workspace, type
Note
You may also want to load your data set from the fuzzydemos or any other directory on the disk, using the ANFIS Editor GUI, directly.
|
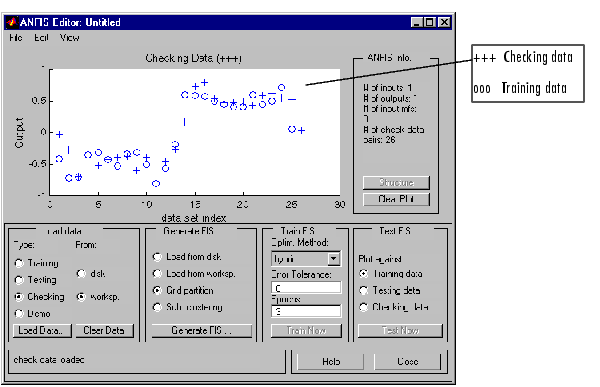
Open the ANFIS Editor GUI by typing anfisedit. To load the training data set, click Training, worksp. and then click Load Data....
The small GUI window that pops up allows you to type in a variable name from the workspace. Type in fuzex1trnData, as shown below.

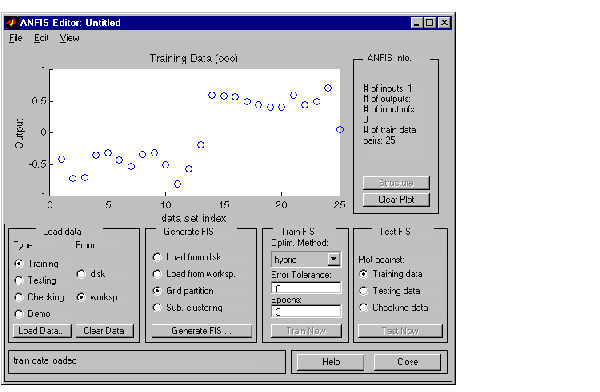
The training data appears in the plot in the center of the GUI as a set of circles.
Notice the horizontal axis is marked data set index. This index indicates the row from which that input data value was obtained (whether or not the input is a vector or a scalar). Next click Checking in the Type column of the Load data portion of the GUI to load fuzex1chkData from the workspace. This data appears in the GUI plot as plusses superimposed on the training data.
This data set will be used to train a fuzzy system by adjusting the membership function parameters that best model this data. The next step is to specify an initial fuzzy inference system for anfis to train.
Initializing and Generating Your FIS
You can either initialize the FIS parameters to your own preference, or if you do not have any preference for how you want the initial membership functions to be parameterized, you can let anfis do this for you.
Automatic FIS Structure Generation with ANFIS
To initialize your FIS using anfis
constant and linear. This limitation of output membership function choices is because anfis only operates on Sugeno-type systems.

You can also implement this FIS generation from the command line using the command genfis1 (for grid partitioning) or genfis2 (for subtractive clustering). A command line language example illustrating the use of genfis1 and anfis is provided later.
Specifying Your Own Membership Functions for ANFIS
Although we don't expect you to do this for this example, you can choose your own preferred membership functions with specific parameters to be used by anfis as an initial FIS for training.
To define your own FIS structure and parameters:
anfis). The output membership functions must either be all constant or all linear. For carrying out this and the following step, see The FIS Editor and The Membership Function Editor.
To load an existing FIS for ANFIS initialization, in the Generate FIS portion of the GUI, click Load from worksp. or Load from disk. You will load your FIS from the disk if you have saved an FIS previously that you would like to use. Otherwise you will be loading your FIS from the workspace. Either of these radio buttons toggle the Generate FIS button to Load.... Load your FIS by clicking this button.
Viewing Your FIS Structure
After you generate the FIS, you can view the model structure by clicking the Structure button in the middle of the right side of the GUI. A new GUI appears, as follows.
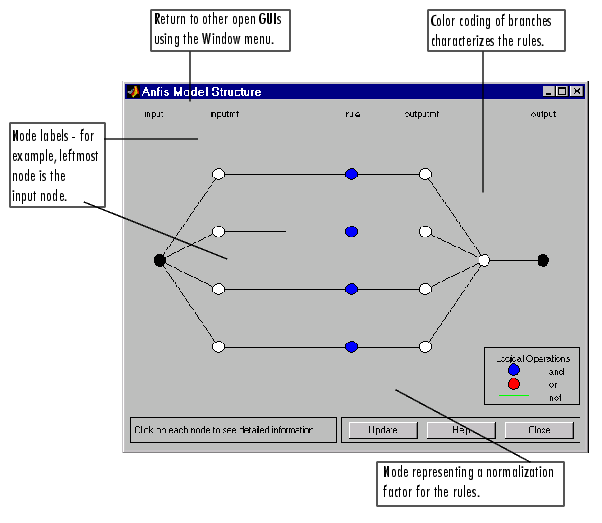
The branches in this nodal graph are color coded to indicate whether or not and, not, or or, are used in the rules. Clicking on the nodes indicates information about the structure.
You can view the membership functions or the rules by opening either the Membership Function Editor, or the Rule Editor from the View menu.
ANFIS Training
The two anfis parameter optimization method options available for FIS training are hybrid (the default, mixed least squares and backpropagation) and backpropa (backpropagation). The Error Tolerance is used to create a training stopping criterion, which is related to the error size. The training will stop after the training data error remains within this tolerance. This is best left set to 0 if you don't know how your training error is going to behave.
The following should appear on your screen.
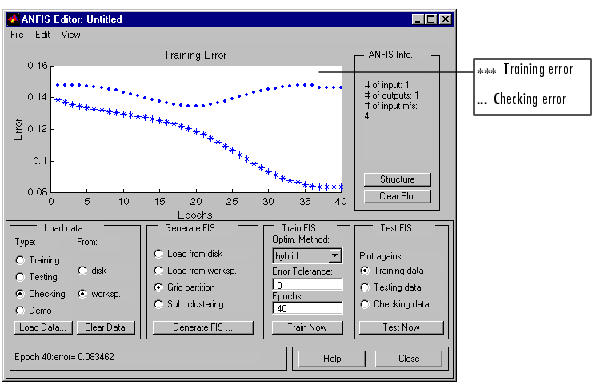
Notice how the checking error decreases up to a certain point in the training and then it increases. This increase represents the point of model overfitting. anfis chooses the model parameters associated with the minimum checking error (just prior to this jump point). This is an example for which the checking data option of anfis is useful.
Testing Your Data Against the Trained FIS
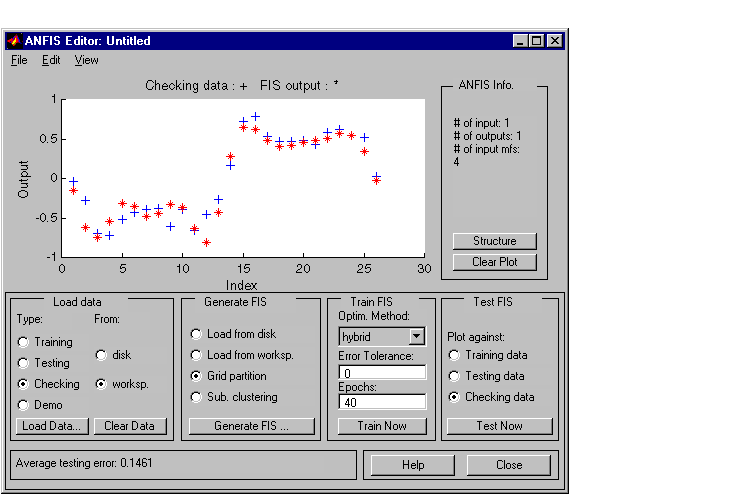
To test your FIS against the checking data, click Checking data in the Test FIS portion of the GUI, and click Test Now. Now when you test the checking data against the FIS it looks pretty good.
| | The ANFIS Editor GUI | ANFIS Editor GUI Example 2: Checking Data Doesn't Validate Model | |