
| Fuzzy Logic Toolbox |   |
The FIS Editor

The following discussion tells you how to build a new fuzzy inference system from scratch. If you want to save time and follow along quickly, you can load the pre-built system by typing
This will load the FIS associated with the file tipper.fis (the .fis is implied) and launch the FIS Editor. However, if you load the pre-built system, you will not be building rules and constructing membership functions.
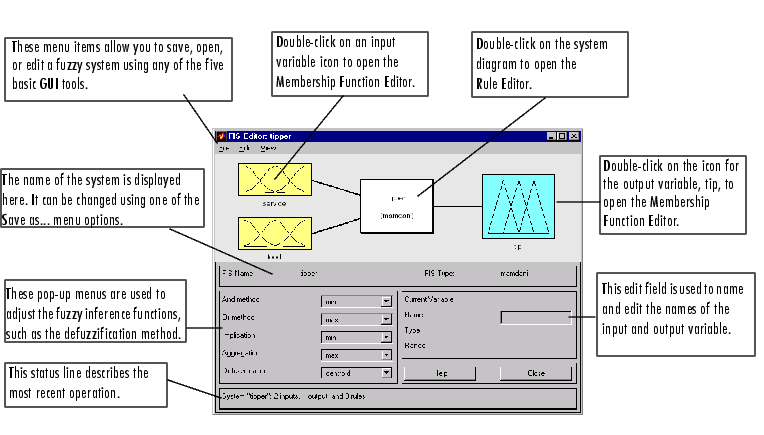
The FIS Editor displays general information about a fuzzy inference system. There's a simple diagram at the top that shows the names of each input variable on the left, and those of each output variable on the right. The sample membership functions shown in the boxes are just icons and do not depict the actual shapes of the membership functions.
Below the diagram is the name of the system and the type of inference used. The default, Mamdani-type inference, is what we've been describing so far and what we'll continue to use for this example. Another slightly different type of inference, called Sugeno-type inference, is also available. This method is explained in Sugeno-Type Fuzzy Inference. Below the name of the fuzzy inference system, on the left side of the figure, are the pop-up menus that allow you to modify the various pieces of the inference process. On the right side at the bottom of the figure is the area that displays the name of either an input or output variable, its associated membership function type, and its range. The latter two fields are specified only after the membership functions have been. Below that region are the Help and Close buttons that call up online help and close the window, respectively. At the bottom is a status line that relays information about the system.
To start this system from scratch, type
at the MATLAB prompt. The generic untitled FIS Editor opens, with one input, labeled input1, and one output, labeled output1. For this example, we will construct a two-input, one output system, so go to the Edit menu and select Add input. A second yellow box labeled input2 will appear. The two inputs we will have in our example are service and food. Our one output is tip. We'd like to change the variable names to reflect that.
input1 to service and press Return.
input2 to food and press Return.
output1 to tip.
 .
.
tipper and click on OK.
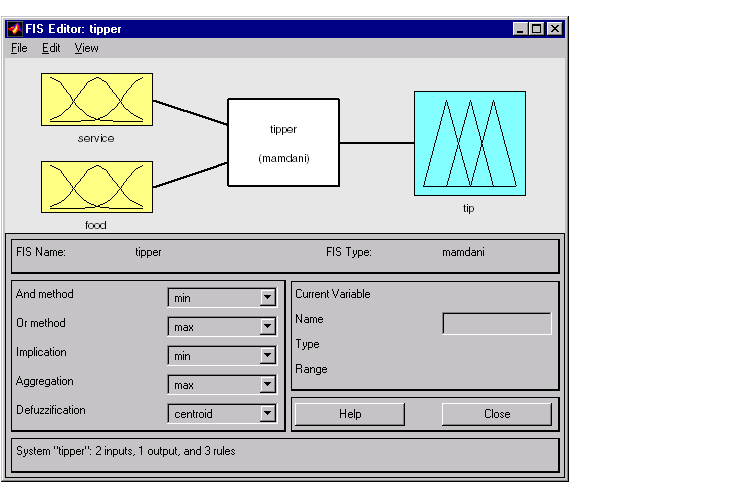
You will see the diagram updated to reflect the new names of the input and output variables. There is now a new variable in the workspace called tipper that contains all the information about this system. By saving to the workspace with a new name, you also rename the entire system. Your window will look something like this.

Leave the inference options in the lower left in their default positions for now. You've entered all the information you need for this particular GUI. Next define the membership functions associated with each of the variables. To do this, open the Membership Function Editor. You can open the Membership Function Editor in one of three ways:
 | Getting Started | The Membership Function Editor |  |