| Model Browser User's Guide |
  |
Test Plan Level
When you select a test plan node (with the icon  ) in the model tree, this view appears.
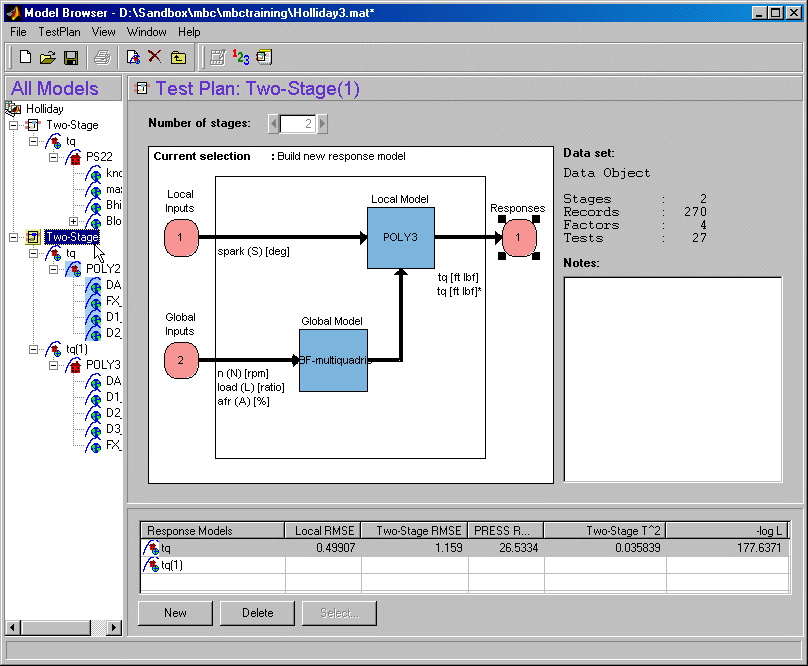
This example is a two-stage model, the same model used in the Quick Start tutorial. All test plan nodes (one- and two-stage) bring up this view with a block diagram of the test plan and the functionality described below.
- At test plan level, the block diagram representations of models provides a graphical interface so you can set up inputs and set up models by double-clicking the blocks in the test plan diagram. These functions can also be reached using the TestPlan menu.
- You can access the Design Editor via the right-click menus on the model blocks or the TestPlan menu (for a particular model -- you must select a model or input block before you can design an experiment). View-> Design Data also opens the Design Editor where you can investigate the design properties of the data.
- You can attach data to a new test plan by choosing TestPlan -> Load New Data or by double-clicking the Responses block in the diagram, which launches the Data Wizard (if the project already has data loaded).
- If a test plan already has data attached to it, you can reach the Data Selection window using the Select Data toolbar button
 or the TestPlan menu item. Here you can match data to a design. For example, after the design changes, new data matching might be necessary. See Data Selection Window for details.
- You can save the current test plan as a template using the TestPlan -> Make Template command or the toolbar button
 . See Local Level.
See also Test Plan Level: Toolbar and Menus
| | Creating New Test Plan Templates | | Block Diagram Representations of Models | |