| Model Browser User's Guide | |
Data Wizard
Dismissing the Data Editor after loading data from the test plan node automatically brings up the Data Wizard.
Alternatively, after setting up a new test plan, if no data has been selected in that test plan, then either of the following also brings up the Data Wizard.
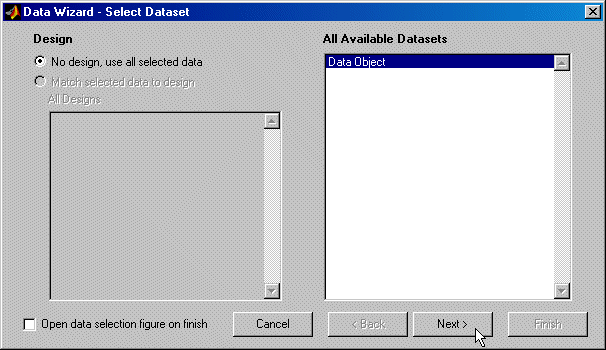
Step 1: Select Data Set
Use the first screen of the wizard to select the data set to build models from. You can also select whether to use all the data set or to match the data to a design, if any designs are in use in the test plan. Designs appear in the left list box.
| Note The check box at bottom left opens the Data Selection window on closing the Data Wizard, for matching data to a design. This check box appears on each screen of the Data Wizard. |
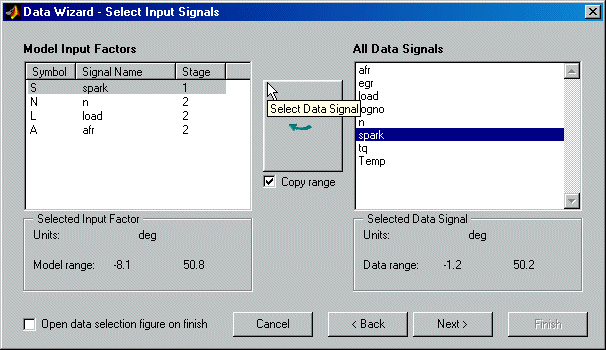
Step 2: Select Input Signals
Select the input signals for the model (on all stages of the hierarchical model) from the list box of data signals on the right, and match them to the correct model variables using the big button with the arrow. Double-clicking an item in the data signals list selects that signal for the currently selected input factor (with the range if the Copy range check box is selected) and then moves to the next input.
These options reappear when you select Data -> Input Signals in the Data Selection window.
If you entered the correct signal name at the model setup stage, the appropriate signal is automatically selected as each model input factor is selected. This can be time-saving if there are many data signals in a data set. If the signal name is not correct, you must select the correct variable for each input by clicking.
Select the check box Copy range if you want to use the range of the selected data signal for the model input range. Ranges are not automatically copied, although stored templates have the ranges that were set when the template was saved.
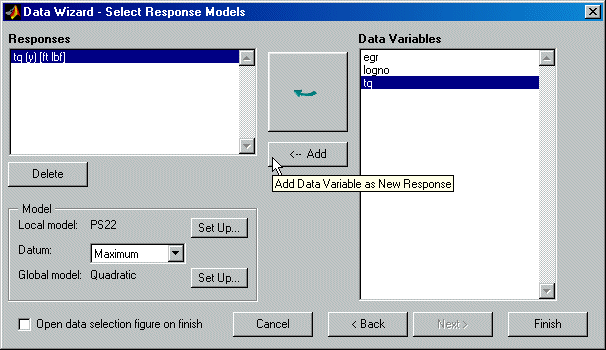
Step 3: Select Response Models
Starting from scratch (with an empty Responses list box), select the desired response in the Data Variables list and click Add.
In the preceding example, the test plan template specified torque as the response model, so it already appears in the Responses list box. If you want to change the response, select another variable and click the large button with the arrow. This replaces the current selected response. The previous response appears in brackets to inform you what has changed.
When there is already a response in the list box, clicking Add does not replace the selection but increases the number of responses. The replace button (with the arrow) is not available when the Responses box is empty.
You can use Delete to remove selected responses. You can select datum models (if the local model supports them), and you can change the local and global models by using the Set Up buttons. See Global Model Setup and Local Model Setup for details.
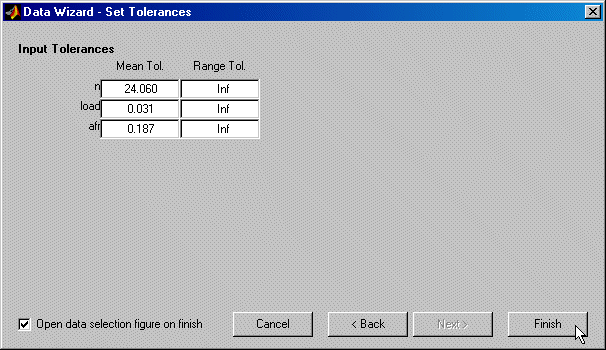
Step 4: Set Tolerances
Setting tolerances is only relevant if you are matching data to a design. This screen only appears if you selected the radio button option Match selected data to design in step 1. You can also set tolerances later using the Data menu in the Data Selection window.
The Data Selection window appears by default when you close the Data Wizard while you are matching data to designs. If you are not matching data, it does not appear unless you select the check box.
The range tolerance sets the matching tolerance on signal range within a particular test. Setting the range tolerance to Inf, the default, causes matching to be performed using test means only.
| | Test Groupings | Data Selection Window | |