| Embedded Target for Texas Instruments C6000 DSPs | |
C6701 EVM Tutorial 2-2--A More Complex Application
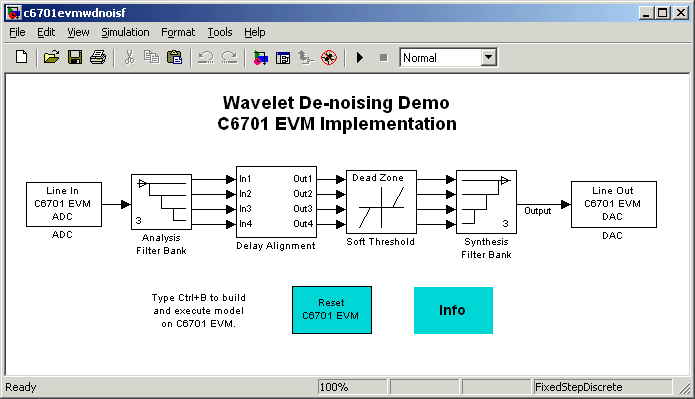
For this tutorial, we demonstrate an application that uses multiple stages--using wavelets to remove noise from a noisy signal. The model name is evm67xdnoisf. As with any model file, you can run this de-noising demonstration by typing c6701evmdnoisf at the MATLAB prompt. Or the model is in the MATLAB demos collection. Here is a picture of the model as it appears in the demonstration library.
Unlike the audio reverberation demo, this model is difficult to build from blocks in Simulink. It uses complicated subsystems for the Delay Alignment block and the Soft Threshold block. For this tutorial you work with a copy of the demonstration model, rather than creating the model.
This tutorial takes you through generating C code and building an executable program from the demonstration model. The resulting program runs on your C6701 EVM as an executable COFF file.
Working and Build Directories
It is convenient to work with a local copy of the c6701evmwdnoisf model, stored in its own directory, which you name (something like c6701dnoisfex). This discussion assumes that the c6701dnoisfex directory resides on drive d:. Use a different drive letter if necessary for your machine. Set up your working directory as follows:
c6701dnoisfex your working directory in MATLAB.
c6701evmwdnoisf model.
c6701evmwdnoisf model as d:/c6701dnoisfex/dnoisfrtw.mdl.
During code generation, Real-Time Workshop creates a build directory within your working directory. The build directory name is model_target_rtw, derived from the name of your source model and your chosen target. In the build directory, Real-Time Workshop stores generated source code and other files created during the build process. You examine the contents of the build directory at the end of this tutorial.
Setting Simulation Program Parameters
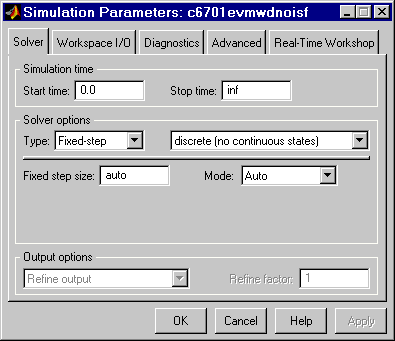
To generate code correctly from the dnoisfrtw model, you must change some of the simulation parameters. In particular, Real-Time Workshop uses a fixed-step solver. To set the parameters, use the Simulation Parameters dialog as follows:
Figure 2-5 shows the Solver pane with the correct parameter settings.
Figure 2-5: Solver Pane of Simulation Parameters Dialog
Selecting the Target Configuration
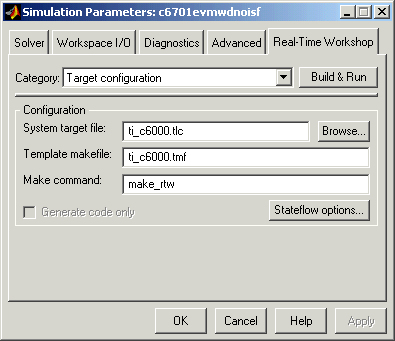
To specify the desired target configuration, you choose a system target file, a template makefile, and a make command.
In these tutorials, you do not need to specify these parameters individually. Instead, you use the ready-to-run ti_c6000.tlc target configuration.
Target configuration from the Category.
Figure 2-6: Real-Time Workshop Pane (Target Configuration Category)
make command.
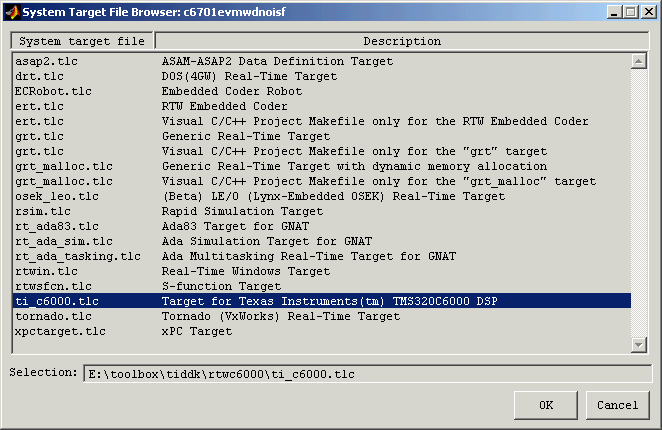
Figure 2-7: The System Target File Browser
ti_c6000.tlc (as in Figure 2-7) and click OK.
ti_c6000.tlc), Template makefile (ti_c6000.tmf), and Make command (make_rtw), as shown in Figure 2-6.
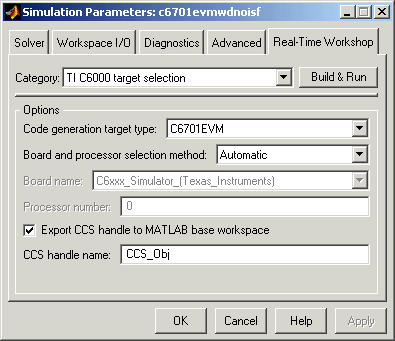
TI C6000 target selection.
C6701 EVM.
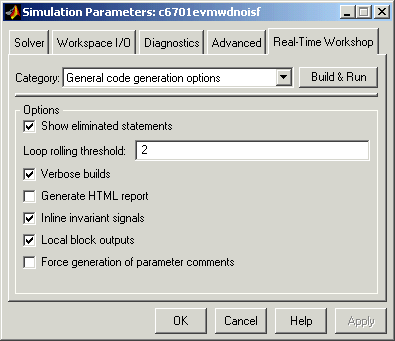
General code generation options from Category. The options displayed here are common to all target configurations. Check to make sure that all options are set to their defaults, as below.
TLC debugging from Category. Clear all the check boxes in this category.
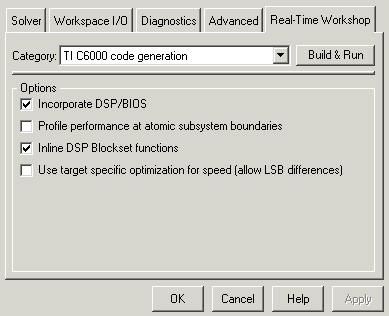
TI C6000 code generation to specify code generation options that apply to the C6701 EVM target.
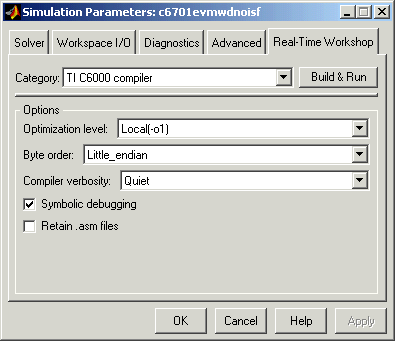
TI C6000 compiler from Category. The options displayed here are specific to the C6000 target. Check to make sure that the options are set as shown below.
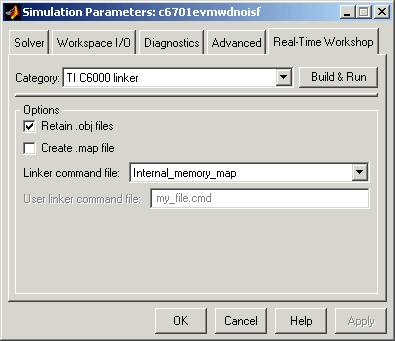
TI C6000 linker from Category. Set the linker options as shown.
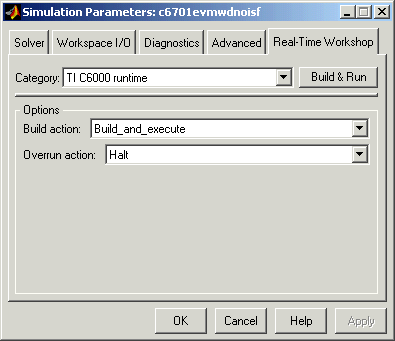
TI C6000 runtime from Category. Set the runtime options as shown.
Building and Running the Program
The Real-Time Workshop build process generates C code from the model, and then compiles and links the generated program. To build and run the program:
dnoisfrtw.exe. In addition, Real-Time Workshop created a build directory, dnoisfrtw_c6000_rtw.
dir command from the MATLAB command window.
!" character passes the command that follows it to the operating system, which runs the stand-alone dnoisfrtw program.
Contents of the Build Directory
The build process creates a build directory and names it model_target_rtw, concatenating the name of your source model and your chosen target. In this example, your build directory is named dnoisfrtw_c6701_rtw.
dnoisfrtw_c6701_rtw contains these generated source code files:
dnoisfrtw.c--the stand-alone C code that implements the model.
dnoisfrtw.h--an include header file containing information about the state variables
dnoisfrtw_export.h--an include header file containing information about exported signals and parameters
The build directory also contains other files used in the build process, such as the object (.obj) files and the generated makefile (dnoisfrtw.mk).
| | Configuring Simulation Parameters for Your Model | Targeting Your C6711 DSK | |