| Real-Time Workshop | |
Tutorial 5: Getting Started with External Mode Using GRT
This section provides step-by-step instructions for getting started with external mode, a very useful environment for rapid prototyping. The tutorial consists of four parts, each of which depends on completion of the preceding ones, in order. The four parts correspond to the steps that you would follow in simulating, building, and tuning an actual real-time application:
The example presented uses the generic real-time target, and does not require any hardware other than the computer on which you run Simulink and Real-Time Workshop. The generated executable in this example runs on the host computer under a separate process from MATLAB and Simulink.
The procedures for building, running, and testing your programs are almost identical in UNIX and PC environments. The discussion notes differences where applicable.
For a more thorough description of external mode, including a discussion of all the options available, see Using the External Mode User Interface" in Chapter 6 of the Real-Time Workshop documentation.
Part 1: Setting Up the Model
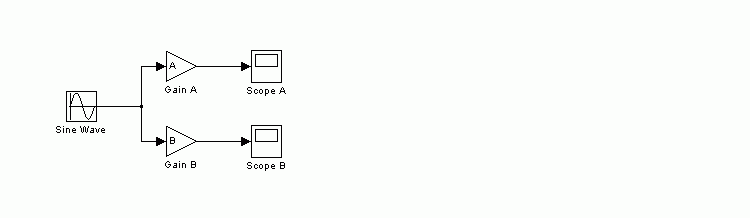
In this part of the tutorial, you create a simple model, ext_example, and a directory called ext_mode_example to store the model and the generated executable:
ext_mode_example your working directory:
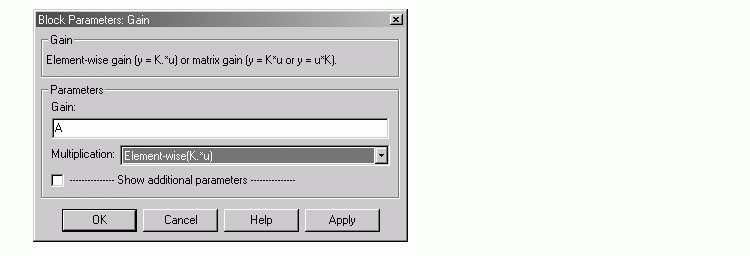
A and B in the MATLAB workspace as follows:
A as shown below.
A and B, or by editing the values in the block parameter dialog boxes.
A=2 and B=3, the output should look like this.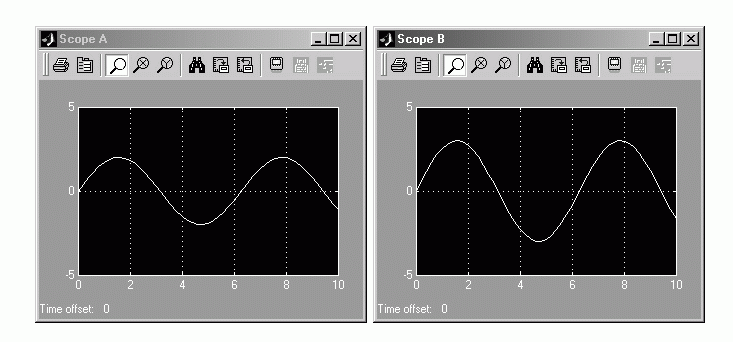
ext_example.mdl.
Part 2: Building the Target Executable
In this section, you set up the model and code generation parameters required for an external mode compatible target program. Then you generate code and build the target executable.
Fixed-step, select the discrete (no continuous states) solver algorithm. Set Fixed step size to 0.01. Leave the other parameters at their default values.
Target configuration from the Category menu.
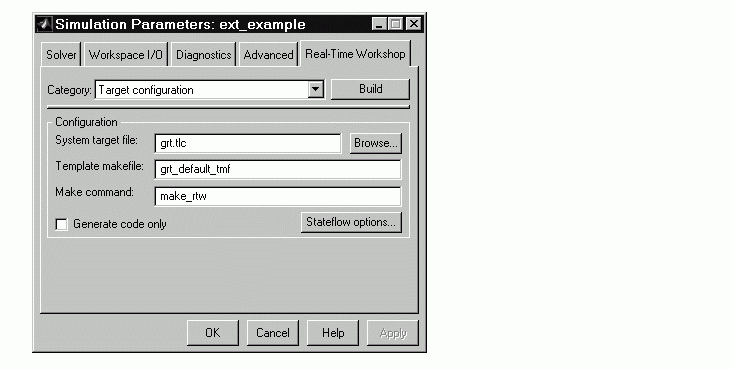
If the GRT target is not selected, click the Browse button and select the GRT target from the System Target File Browser. Then click OK to close the browser. Return to the Real-Time Workshop pane and click Apply.
GRT code generation options from the Category menu and select the External mode option.This enables generation of external mode support code.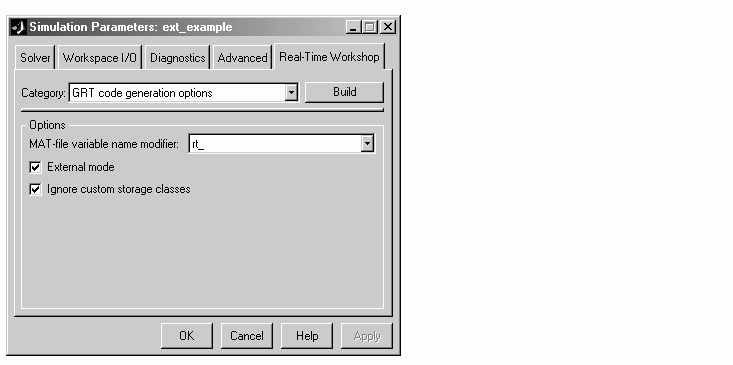
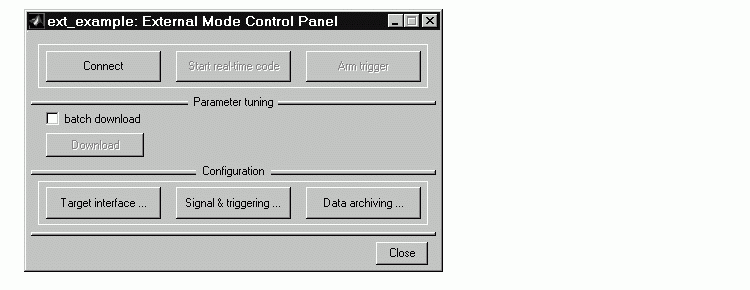
The top four buttons are for use after the target program has started. The three lower buttons open three separate dialog boxes:
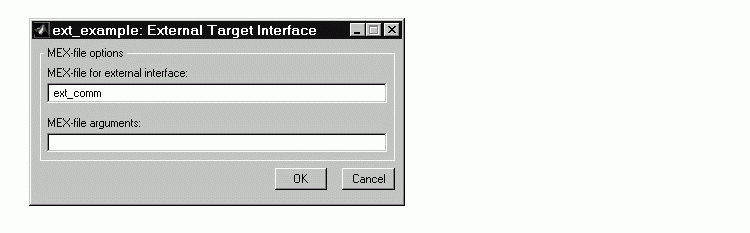
ext_comm, a MEX-file provided by Real-Time Workshop. ext_comm supports communication via the TCP/IP communications protocol.
The MEX-file arguments field lets you specify arguments, such as a TCP/IP server port number, to be passed to the external interface program. Note that these arguments are specific to the external interface file you are using.
For information on these arguments, see The External Interface MEX-File of the Real-Time Workshop documentation.
This exercise uses the default arguments. Leave the MEX-file arguments field blank.
The External Target Interface dialog box should appear as shown below.
In the next section, you will run the ext_example executable and use Simulink as an interactive front end to the running target program.
Part 3: Running the External Mode Target Program
The target executable, ext_example, is now in your working directory. In this section, you run the target program and establish communication between Simulink and the target.
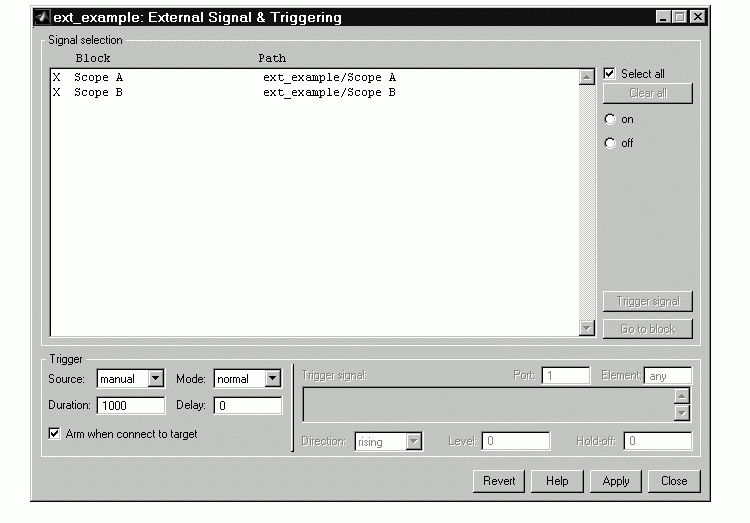
The External Signal & Triggering dialog box displays a list of all the blocks in your model that support external mode signal monitoring and logging. The External Signal & Triggering dialog box also lets you configure which signals are viewed and how they are acquired and displayed. You can reconfigure the External Signal & Triggering dialog box while the target program runs.
In this exercise you will observe and use the default settings of the External Signal & Triggering dialog box.
ext_example.
Xterm window). At the command prompt, change to the ext_mode_example directory that you created in step 1. The target program is in this directory:
and press Return. The target program begins execution. Note that the target program is in a wait state, so there is no activity in the command prompt window.
The -tf switch overrides the stop time set for the model in Simulink. The inf value directs the model to run indefinitely. The model code will run until the target program receives a stop message from Simulink.
The -w switch instructs the target program to enter a wait state until it receives a Start real-time code message from the host. This switch is required if you want to view data from time step 0 of the target program execution, or if you want to modify parameters before the target program begins execution of model code.
A=2 and B=3, the output looks like this.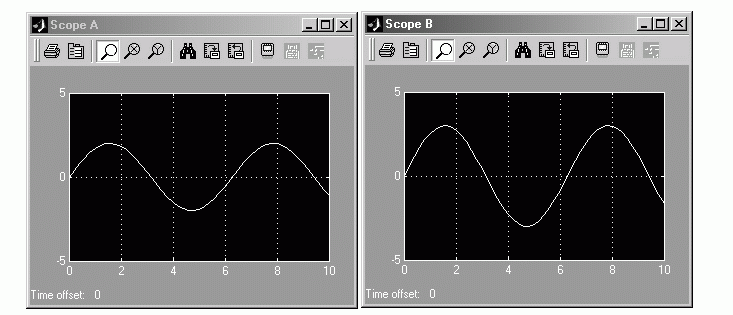
Having established communication between Simulink and the running target program, you can tune block parameters in Simulink and observe the effects the parameter changes have on the target program. You will do this in the next section.
Part 4: Tuning Parameters
You can change the gain factor of either Gain block by assigning new values to the variables A or B in the MATLAB workspace. When you change block parameter values in the workspace during a simulation, you must explicitly update the block diagram with these changes. When the block diagram is updated, the new values are downloaded to the target program. To tune the variables A and B:
ext_example model window. Select Update Diagram from the Edit menu, or press the Ctrl+D keys. As soon as Simulink has updated the block parameters, the new gain values are downloaded to the target program, and the effect of the gain change becomes visible on the scopes.
Note, however, that you cannot change the sample time of the Sine Wave block. Block sample times are part of the structural definition of the model and are part of the generated code. Therefore, if you want to change a block sample time, you must stop the external mode simulation and rebuild the executable.
| | Tutorial 4: A First Look at Generated Code | Using Real-Time Workshop | |
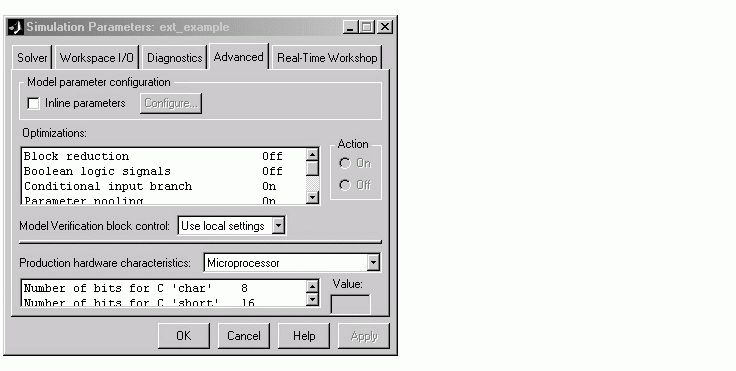 The Advanced pane looks like the figure below.