| Real-Time Workshop | |
Tutorial 3: Code Validation
In this tutorial, the code generated from the f14rtw model is validated against the model. The code is validated by capturing and comparing data from runs of the Simulink model and the generated program.
Logging Signals via Scope Blocks
This example uses Scope blocks (rather than Outport blocks) to log both input and output data. To configure the Scope blocks to log data:
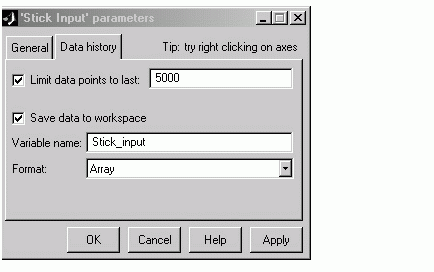
Stick_input) that is to receive the scope data.
Stick_input during simulation. The generated code will log the same signal data to the MAT-file variable rt_Stick_input during a run of the executable program.
Pilot_G_force and Angle_of_attack.
Logging Simulation Data
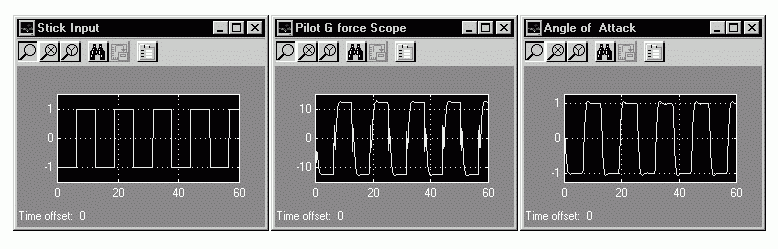
The next step is to run the simulation and log the signal data from the Scope blocks:
whos command to observe that the array variables Stick_input, Pilot_G_force, and Angle_of_attack have been saved to the workspace.
Logging Data from the Generated Program
Since you have modified the model, you must rebuild and run the f14rtw executable in order to obtain a valid data file:
f14rtw.mat and observe the workspace variables:
rt_Pilot_G_force, rt_Angle_of_attack, rt_Stick_input, and rt_tout.
Comparing Results of the Simulation
and the Generated Program
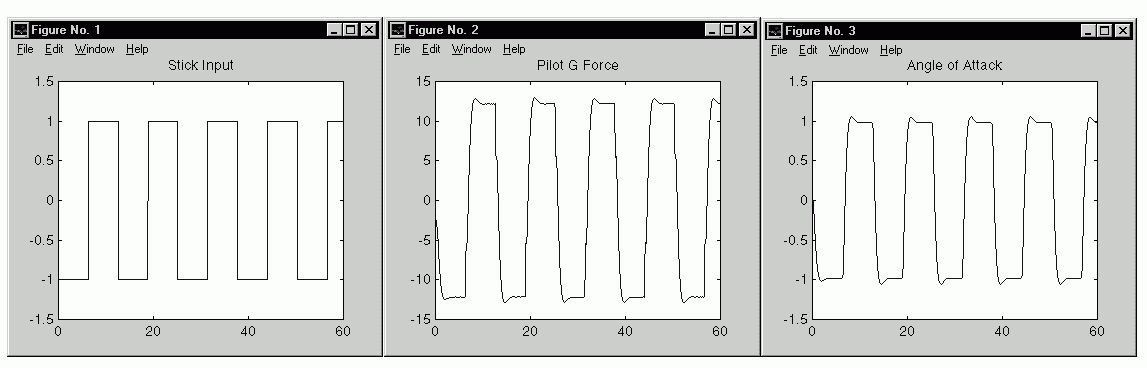
Your Simulink simulations and the generated code should produce nearly identical output.
You have now obtained data from a Simulink run of the model, and from a run of the program generated from the model. It is a simple matter to compare the f14rtw model output to the results achieved by Real-Time Workshop.
Comparing Angle_of_attack (simulation output) to rt_Angle_of_attack (generated program output) produces
Comparing Pilot_G_force (simulation output) to rt_Pilot_G_force (generated program output) produces
Overall agreement is within 10-13. This slight error can be caused by many factors, including
For example, a function such as sin(2.0) may return a slightly different value, depending on which C library you are using.
For the same reasons, your comparison results may not be identical to those above.
| | Tutorial 2: Data Logging | Tutorial 4: A First Look at Generated Code | |