| Model Browser User's Guide | |
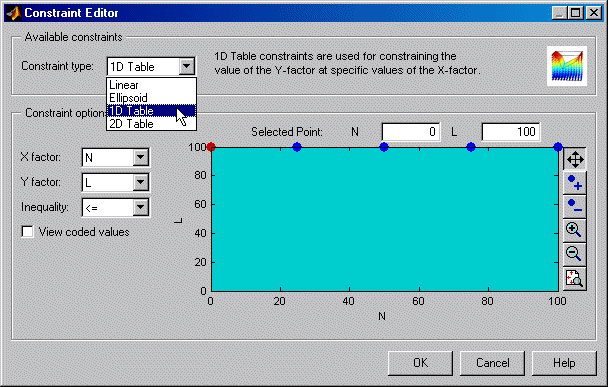
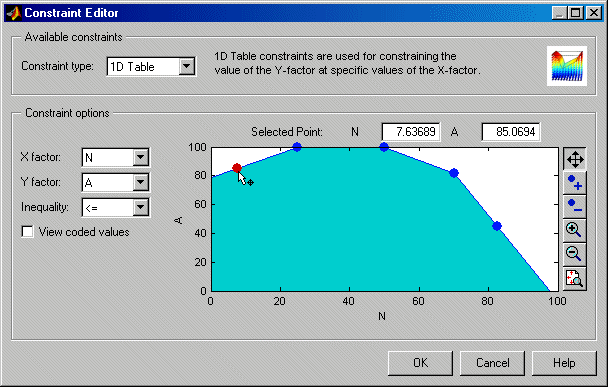
Applying Constraints
In many cases designs might not coincide with the operating region of the system to be tested. For example, a conventional stoichiometric AFR automobile engine normally does not operate with high exhaust gas recirculation (EGR) in a region of low speed (n) and low load (l). You cannot run 15% EGR at 800 RPM idle with a homogeneous combustion process. There is no point selecting design points in impractical regions, so you can constrain the candidate set for test point generation. Only optimal designs have candidate sets of points; classical designs have set points, and space-filling designs distribute points between the coded values of (1, -1).
You would usually set up constraints before making designs. Applying constraints to classical and space-filling designs simply removes points outside the constraint. Constraining the candidate set for optimal designs ensures that design points are optimally chosen within the area of interest only.
Designs can have any number of geometric constraints placed upon them. Each constraint can be one of four types: an ellipsoid, a hyperplane, a 1-D lookup table, or a 2-D lookup table. For further details, see Applying Constraints in the GUI Reference for a full description of the constraint functions.
To add a constraint to your currently selected design:
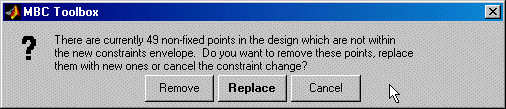
For optimal designs you get the dialog shown, where you also have the option to replace the points with new ones chosen (optimally if possible) within the new candidate set.
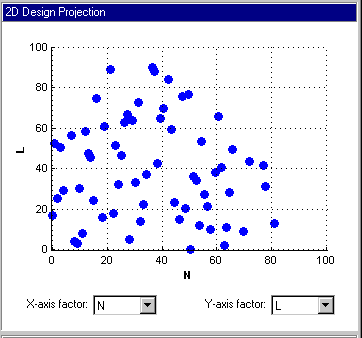
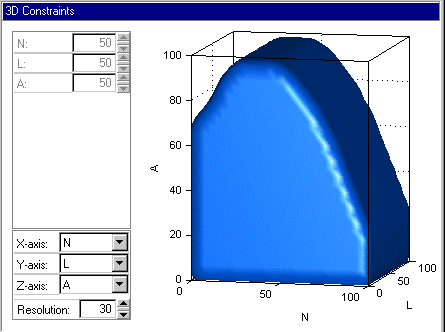
If you examine the 2-D projection of the hypercube you will notice the effects of the new constraint on the shape of the design, as shown in the preceding example.
These views are intended to give some idea of the region of space that is currently available within the constraint boundaries.
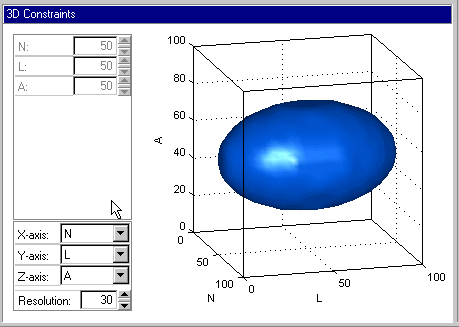
This reduces the space available for the candidate set by a third in the A and N axes, forming an ellipsoid, as shown below. The L axis, left at 1, is not constrained at the midpoint of N and A. To leave L unconstrained (a cylinder) put the value of L=0.
Both constraints are applied to this design, but the ellipsoid lies entirely within the previous 1-D table constraint.
| | Space-Filling Designs | Saving Designs | |