| xPC Target |
  |
Signal Tracing with xPC Target Remote Control Tool
Opening a xPC Target Scope window on the host or target PC allows you to view signals while running and testing your target application.
After you create and download a target application to the target PC, you can view signals. This procedure uses the Simulink model xpc_osc4.mdl as an example, and assumes you have created a target application and downloaded it to the target PC. See xPC Target Application.
- In the MATLAB Command Window, type
- The xPC Target Remote Control Tool window opens and connects to the target application.
- From the scope type list, select either
Target scope or Host scope. For example, select Target scope, and then click Add Scope.
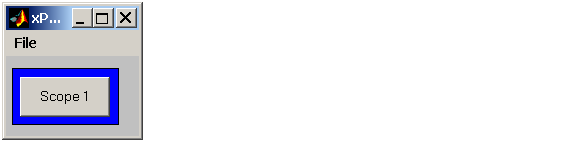
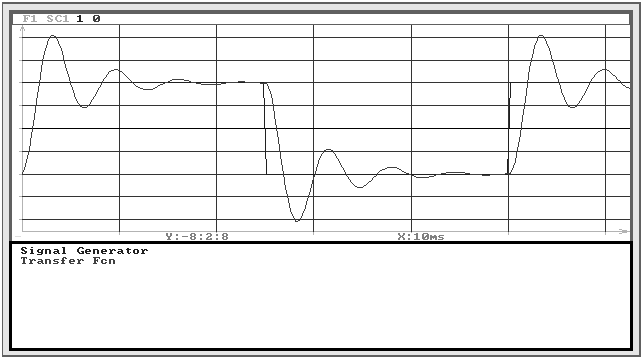
- xPC Target creates a scope on the target PC, and in the Scopes list, displays
1(Target).
- Click Add Signals.
- The xPC Target Simulink Viewer window opens with a diagram of your Simulink model.
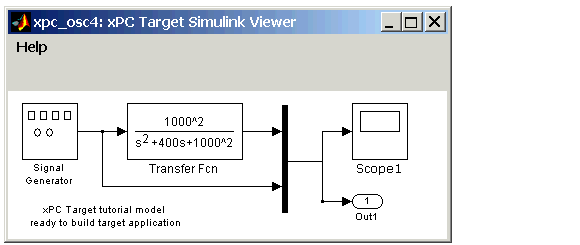
- Move the mouse pointer over the signal lines.
- A blue line indicates that you can add this signal to a scope.
- A red line, with the message
Signal cannot be monitored, indicates that you cannot add this signal to a scope.
- Point to a signal line and right-click. For example, right-click over the signal from the Signal Generator.
- A menu opens with a list of scopes and options to add a signal or to remove a previously added signal.
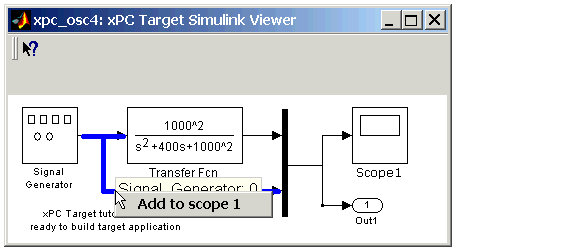
- From the menu, click an option. For example, click Add to scope 1.
- The signal from the Signal Generator is added to the scope on the target PC screen.
- Point to the signal from the Transfer Function block, right-click, and select Add to scope 1.
- From the toolbar, click the start button
 . The target application and scope begin running on the target PC, and then stop when the target application reaches the stop time.
Setting Trigger for Signals with the Target Scope Manager
- In the xPC Target Remote Control Tool window, from the Tools menu, click Target Scope Manager.
- The scope manager window opens. This window is the root window of the xPC Target Scope graphical interface, and it displays the scopes that you have added.
- Point to the Scope 1 button and right-click. A menu opens.
- From the menu, click Properties.
- The xPC Target: Target Scope 1 window opens.
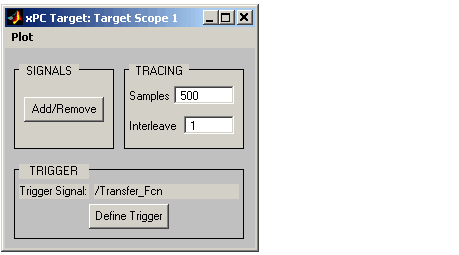
- Click Define Trigger. The xPC Target: Trigger for Target Scope 1 window opens.
- From the Mode list, select
Software, Signal, or Scope. For example, select Signal.
- From the Slope list, select
EITHER, RISING, or FALLING. For example, select RISING.
- From the Signal list, click a signal to trigger the scope. For example, click
Signal_generator.
- In the xPC Target Remote Control Tool window, from the toolbar, click the start button
 .
.
- The target application and scope begin to run on the target PC, and then stop when the target application reach the stop time.
Adding and Removing Signals with the Host Scope Manager
- In the xPC Target Remote Control Tool window, from the Tools menu, click Host Scope Manager.
- The scope manager window for scopes of type host opens.

- Click the button for a scope. For example, click View Scope 2. The xPC Target: Scope 2 window opens.
- In the Scope window, click the Add/Remove button.
- The Add/Remove Signals dialog box opens. It allows you to specify the signals to trace.
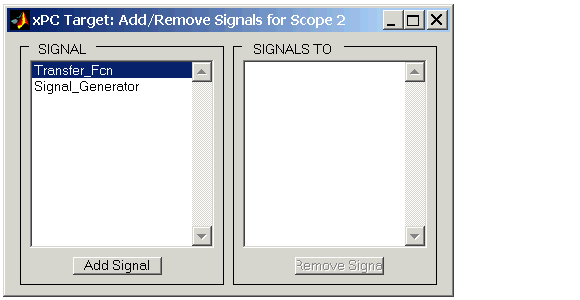
The SIGNAL list box displays all the available signals from the target application. The names of the signals shown correspond to the block names within the Simulink model xpc_osc4.mdl. The block name indicates the output signal from that block.
Click a block name to highlight it, and then click the Add Signal button to move the signal to the SIGNALS TO box on the right of the window. The SIGNALS TO box contains the signals to be traced by this scope.
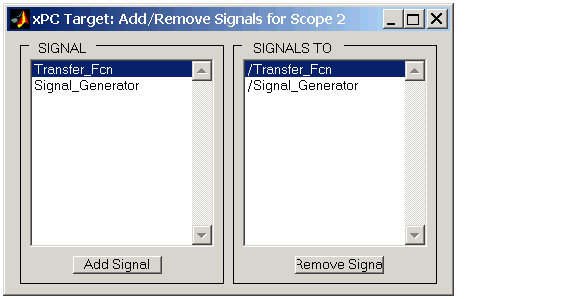
- From the SIGNAL list box, click
Transfer_Fcn, and then click the Add Signal button. Similarly, add the Signal_Generator signal.
- Changes to the Add/Remove Signals dialog box are shown below. You can remove the signals to trace by clicking the block name in the SIGNALS TO box, and then clicking the Remove Signal button.
During the next steps, you can leave the Add/Remove Signals dialog box open, or close and reopen it without restrictions.
- In the xPC Target Remote Control Tool window, from the toolbar, click the start button
 . The target application and scope begin to run on the target PC, and then stop when they reach the stop time.
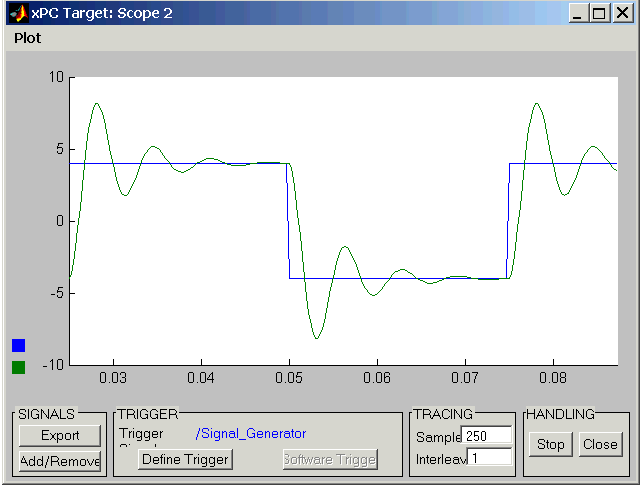
If you are using a scope of type host, there is a delay between collecting data packages because of the communication overhead between the target PC and the host PC. If you are using a scope of type target, the scope window is updated faster than when using a scope on the host PC.
Saving Data from a Scope of Type Host to the MATLAB Workspace
While a target application is running, data is saved in an xPC Target Scope buffer. You can export the buffer to MATLAB. Exporting data with the xPC Target Scope window does not require you to add Outport blocks to your Simulink model, nor does it require you to activate the logging of signals. You can select the signals to collect, and you can capture unexpected outputs during a run.
After you complete a run with a scope, you can move data from the last data package collected to the MATLAB workspace.
- In the xPC Target Remote Control Tool window, from the Tools menu, click Host Scope Manager.
- The scope manager window and the xPC Target Scope window open.
- In the xPC Target Scope window, from the Plot menu, click Variable Name for Export.
- The Variable Name for Export dialog box opens.
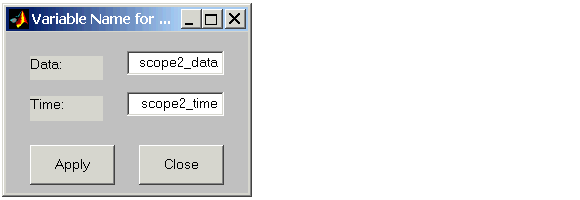
- In the Data and Time text boxes, enter the names of the MATLAB variables to save data from a trace. Click the Apply button, and then click the Close button. The default name for the time vector is
scopen_time, and the default name for the signal vector is scopen_data where n is the scope number.
- In the xPC Target Scope window, click the Export button. You can export data regardless of whether a scope is started or stopped.
- In the MATLAB Command Window, type
- MATLAB displays a list of variables and their descriptions. For example:
You can now save or further analyze the data using the MATLAB variables.
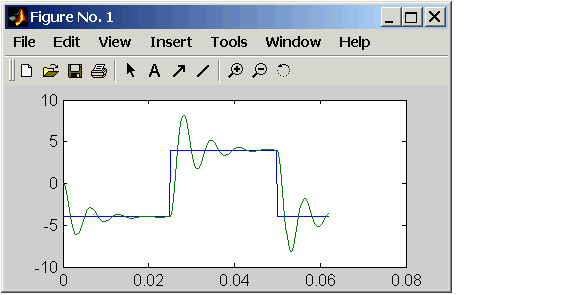
- Type
- MATLAB plots the variables
scope1_time and scope1_data in a new window.
- Close the scope manager window by using one of the following procedures:
- From the File menu, click Close All Scopes.
- From the File menu, click Close Scope Manager.
- A message box opens asking whether you want to save the current scope state. Use one of the following procedures:
- If you do not want to save the scope state, click No.
- If you want to save the scope state, click Yes. The Save Scopes dialog box opens. Enter the name of a file, and then click Save.
| | Signal Tracing | | Signal Tracing with MATLAB | |