
| xPC Target |   |
Using Target Scope Blocks with StandAlone
When using xPC Target Embedded Option with StandAlone mode, you can also use target scopes for tracing signals and displaying them on the target screen.
Because host-to-target communication is not supported with the StandAlone mode, scope objects of type target must be defined within the Simulink model before the xPC Target application is built.
xPC Target (basic package) offers a block for such purposes.
Copy the Scope (xPC) block into your block diagram and connect the signals you would like to view to this block. Multiple signals can be used, provided a Mux block is used to bundle them.
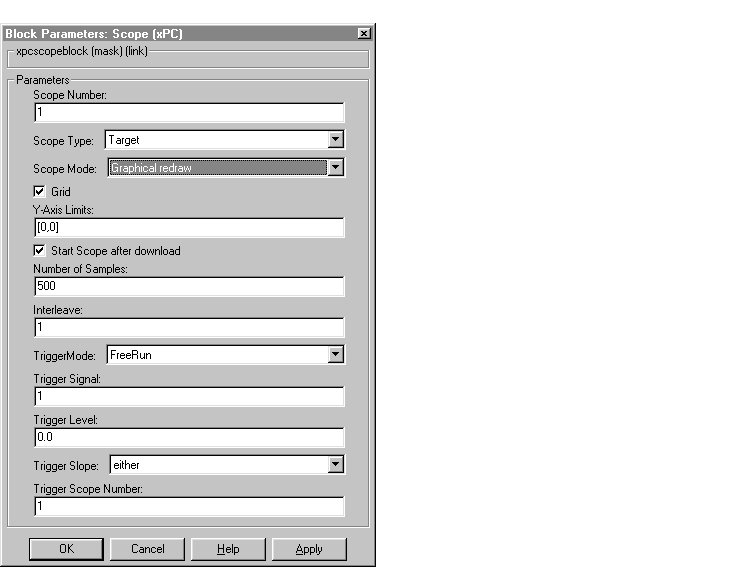
It is necessary to edit the Scope (xPC) dialog box and confirm that the check box entry for Start Scope after download is selected, as shown in the following dialog box.

This setting is required to enable target scopes to begin operating as soon as the application starts running. The reason this setting is required is that the host PC is not available in StandAlone mode to issue a command that would start scopes. With these settings, click Build and copy the files from your modelname_xpc_emb subdirectory to your boot disk. Then boot your target PC. When the target application starts to run, the target scopes start automatically. A monitor is needed on your target PC to view the results.
Note
When using target scopes with StandAlone mode, you must specify the Scope Type as target prior to generating code.
|
 | Creating a Target Boot Disk for StandAlone | Software Environment |  |