| Virtual Reality Toolbox |
  |
Adding a Virtual Reality Toolbox Block
Simulating a Simulink model generates signal data for a dynamic system. By connecting the Simulink model to a virtual world, you can use this data to control and animate the virtual world.
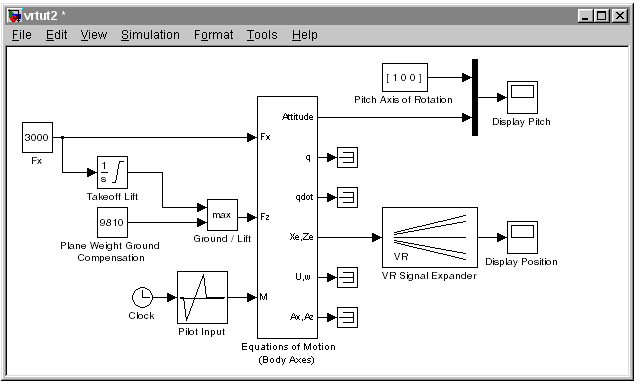
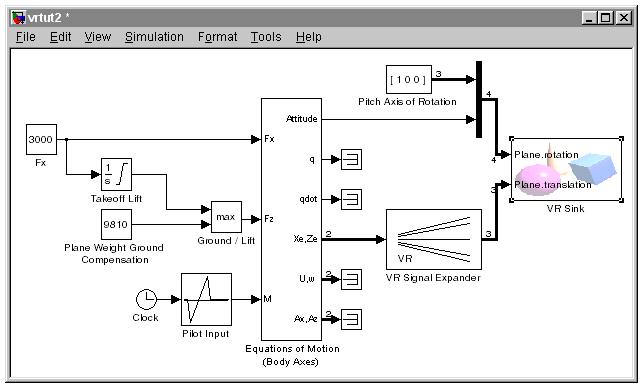
After you create a virtual world and a Simulink model, you can connect the two with Virtual Reality Toolbox blocks. The example in this procedure simulates a plane taking off and lets you view it in a virtual world:
- In the MATLAB Command Window, type
- A Simulink model opens without a Virtual Reality Toolbox block that connects the model to a virtual world.
- From the Simulation menu, select Normal, then click Start.
- Observe the results of the simulation in the scope windows.
- In the MATLAB Command Window, type
- The Virtual Reality Toolbox library opens.
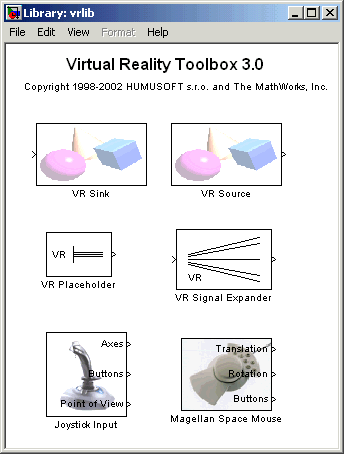
- From the Library window, drag and drop the VR Sink block to the Simulink diagram. You can then close the Library: vrlib window.
- Now you are ready to select a virtual world for the visualization of your simulation. A simple virtual world with a runway and a plane is in the VRML file
vrtkoff.wrl.
- In the Simulink model, double-click the block labeled VR Sink.
- The Block Parameters: VR Sink dialog box opens.
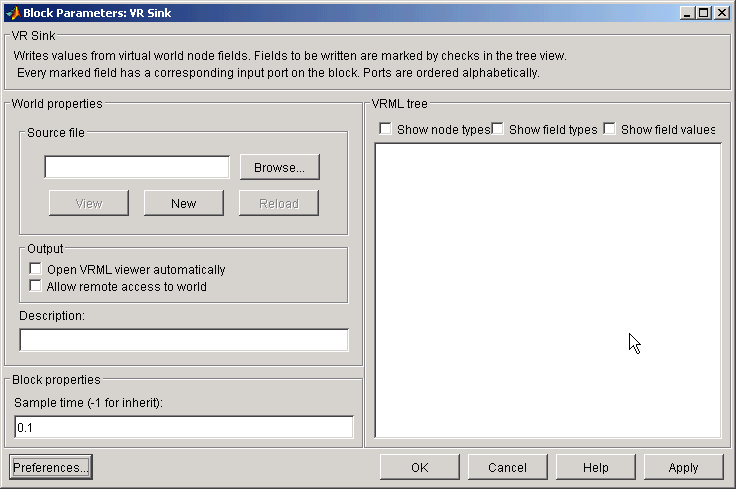
- In the Description text box, enter a brief description of the model. This description appears on the list of available worlds served by the Virtual Reality Toolbox server. For example, type
- Click the Browse button. The Select World dialog box opens. Find the directory
<matlab root>\toolbox\vr\vrdemos. Select the file vrtkoff.wrl, and click Open.
- In the Block Parameters: VR Sink dialog box, click Apply.
- A VRML tree appears on the right side, showing the structure of the associated virtual reality scene.
- Select Show node types. On the left of the Plane Transform node, click the + square.
- The Plane Transform tree expands. Now you can see what characteristics of the plane can be driven from Simulink. This model computes the position and the pitch of the plane.
- In the Plane Transform tree, select the translation and rotation fields.
- The selected fields are marked with checks. These fields represent the position (translation) and the pitch (rotation) of the plane.
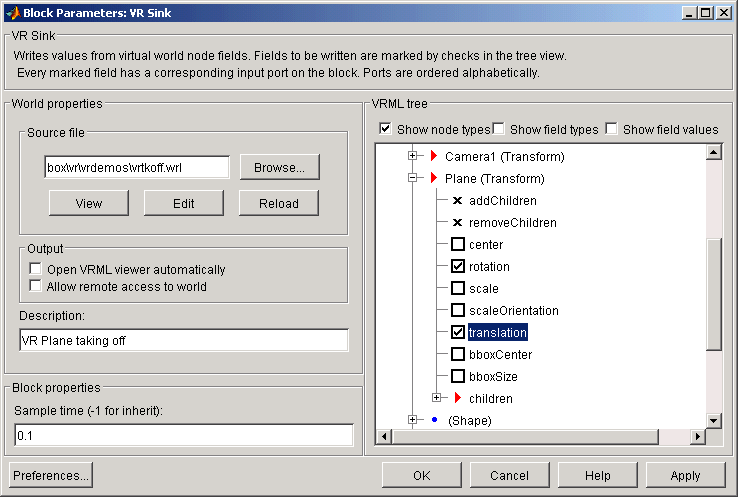
- Click OK.
- In the Simulink diagram, the VR Sink block is updated with two inputs.

The first input is Plane rotation. The rotation is defined by a four-element vector. The first three numbers define the axis of rotation. In this example, it should be [1 0 0] for the x-axis. The pitch of the plane is expressed by the rotation about the x-axis. The last number is the rotation angle around the x-axis, in radians.
- In the Simulink model, connect the line going to the Scope block labeled Display Pitch to the Plane rotation input.
- The second input is Plane translation. This input describes the plane's position in the virtual world. This position consists of three coordinates, x, y, z. The connected vector must have three values. In this example, the runway is in the x-z plane. The y-axis defines the altitude of the plane.
- In the Simulink model, connect the line going to the Scope block labeled Display Position to the Plane translation input.
- After connecting the signals and removing the Scope blocks, your model should look similar to the figure shown.
Note
Virtual world degrees of freedom have different requested input vector sizes depending on the associated VRML field types. If the vector size of the connected signal does not match the associated VRML field size, an Incorrect input vector size error is reported when you start the simulation.
|
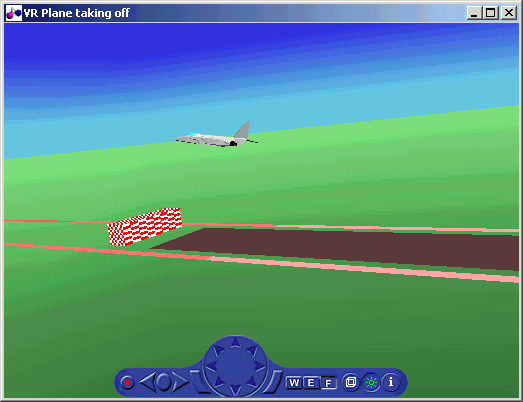
- Double-click the VR Sink block in the Simulink model. Select the View button. A viewer window containing the plane's virtual world opens.
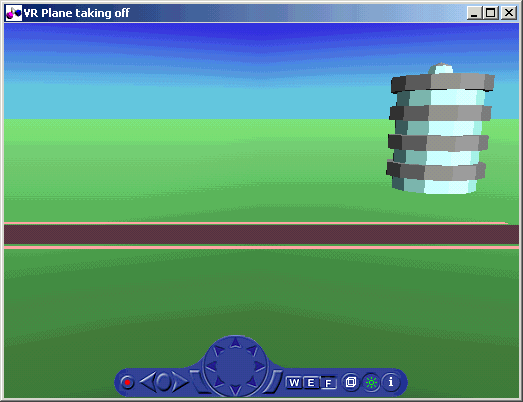
- From the Simulation menu of the model file, click Start.
- A plane, moving right to left, starts down the runway and takes off into the air.
| | Associating a Virtual World with Simulink | | Changing the Virtual World Associated with a Simulink Block | |