| Partial Differential Equation Toolbox | |
Getting Started
To get you started, let us use the graphical user interface (GUI) pdetool, which is a part of the PDE Toolbox, to solve a PDE step by step. The problem that we would like to solve is Poisson's equation,  . The 2-D geometry on which we would like to solve the PDE is quite complex. The boundary conditions are of Dirichlet and Neumann types.
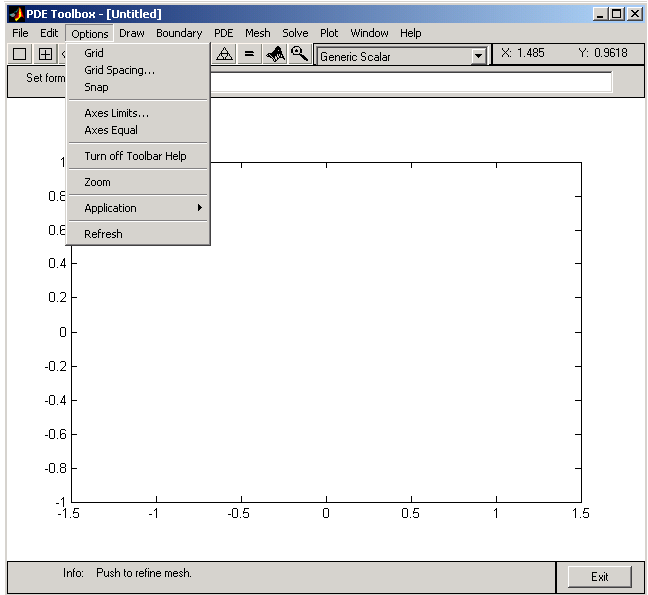
First, invoke MATLAB. To start the GUI, type the command pdetool at the MATLAB prompt. It can take a minute or two for the GUI to start. The GUI looks similar to the figure below, with exception of the grid. Turn on the grid by selecting Grid from the Options menu. Also, enable the "snap-to-grid" feature by selecting Snap from the Options menu. The "snap-to-grid" feature simplifies aligning the solid objects.
The first step is to draw the geometry on which you want to solve the PDE. The GUI provides four basic types of solid objects: polygons, rectangles, circles, and ellipses. The objects are used to create a Constructive Solid Geometry model (CSG model). Each solid object is assigned a unique label, and by the use of set algebra, the resulting geometry can be made up of a combination of unions, intersections, and set differences. By default, the resulting CSG model is the union of all solid objects.
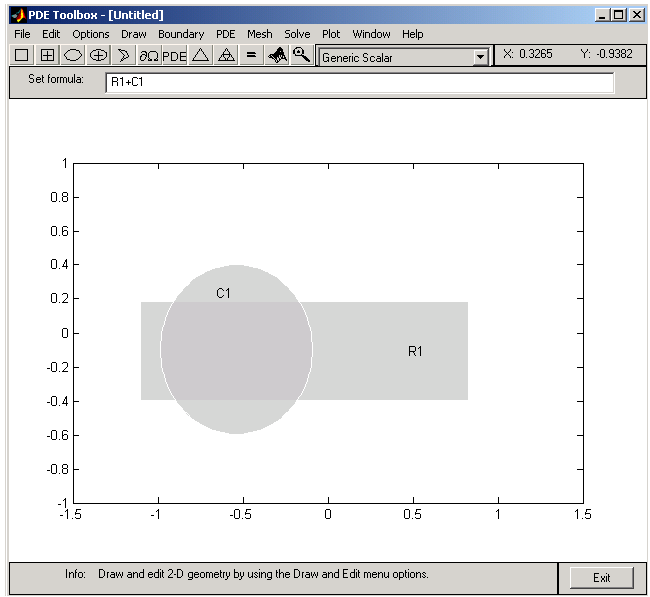
To select a solid object, either click the button with an icon depicting the solid object that you want to use, or select the object by using the Draw pull-down menu. In this case, rectangle/square objects are selected. To draw a rectangle or a square starting at a corner, click the rectangle button without a + sign in the middle. The button with the + sign is used when you want to draw starting at the center. Then, put the cursor at the desired corner, and click-and-drag using the left mouse button to create a rectangle with the desired side lengths. (Use the right mouse button to create a square.) Notice how the "snap-to-grid" feature forces the rectangle to line up with the grid. When you release the mouse, the CSG model is updated and redrawn. At this stage, all you have is a rectangle. It is assigned the label R1. If you want to move or resize the rectangle, you can easily do so. Click-and-drag an object to move it, and double-click an object to open a dialog box, where you can enter exact location coordinates. From the dialog box, you can also alter the label. If you are not satisfied and want to restart, you can delete the rectangle by clicking the Delete key or by selecting Clear from the Edit menu. Next, draw a circle by clicking the button with the ellipse icon with the + sign, and then click-and-drag in a similar way, using the right mouse button, starting at the circle center.
The resulting CSG model is the union of the rectangle R1 and the circle C1, described by set algebra as R1+C1. The area where the two objects overlap is clearly visible as it is drawn using a darker shade of gray. The object that you just drew -- the circle -- has a black border, indicating that it is selected. A selected object can be moved, resized, copied, and deleted. You can select more than one object by Shift-clicking the objects that you want to select. Also, a Select All option is available from the Edit menu.
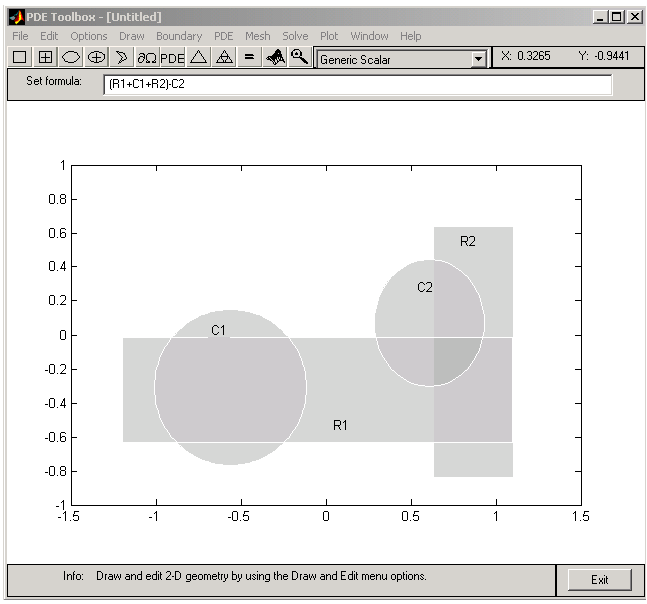
Finally, add two more objects, a rectangle R2 and a circle C2. The desired CSG model is formed by subtracting the circle C2 from the union of the other three objects. You do this by editing the set formula that by default is the union of all objects: C1+R1+R2+C2. You can type any other valid set formula into Set formula edit field. Click in the edit field and use the keyboard to change the set formula to
If you want, you can save this CSG model as an M-file. Use the Save As. . . option from the File menu, and enter a filename of your choice. It is good practice to continue to save your model at regular intervals using Save. All the additional steps in the process of modeling and solving your PDE are then saved to the same M-file. This concludes the drawing part.
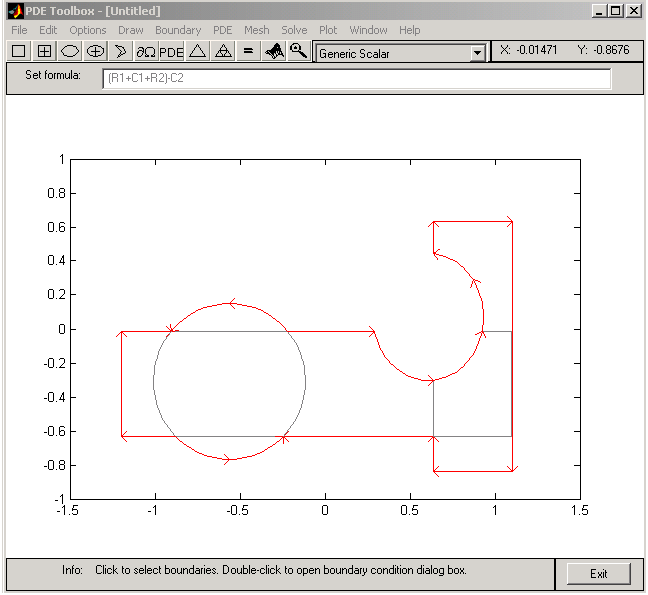
You can now define the boundary conditions for the outer boundaries. Enter the Boundary Mode by clicking the  icon or by selecting Boundary Mode from the Boundary menu. You can now remove subdomain borders and define the boundary conditions.
The gray edge segments are subdomain borders induced by the intersections of the original solid objects. Borders that do not represent borders between, e.g., areas with differing material properties, can be removed. From the Boundary menu, select the Remove All Subdomain Borders option. All borders are then removed from the decomposed geometry.
The boundaries are indicated by colored lines with arrows. The color reflects the type of boundary condition, and the arrow points toward the end of the boundary segment. The direction information is provided for the case when the boundary condition is parameterized along the boundary. The boundary condition can also be a function of x and y, or simply a constant. By default, the boundary condition is of Dirichlet type: u = 0 on the boundary.
Dirichlet boundary conditions are indicated by red color. The boundary conditions can also be of a generalized Neumann (blue) or mixed (green) type. For scalar u, however, all boundary conditions are either of Dirichlet or the generalized Neumann type. You select the boundary conditions that you want to change by clicking to select one boundary segment, by Shift-clicking to select multiple segments, or by using the Edit menu option Select All to select all boundary segments. The selected boundary segments are indicated by black color.
For this problem, change the boundary condition for all the circle arcs. Select them by using the mouse and Shift-click those boundary segments.
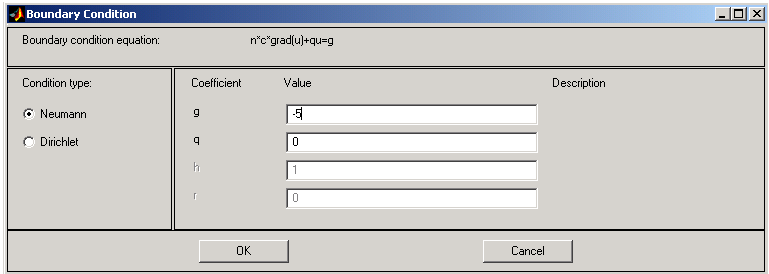
Double-clicking anywhere on the selected boundary segments opens the Boundary Condition dialog box. Here, you select the type of boundary condition, and enter the boundary condition as a MATLAB expression. Change the boundary condition along the selected boundaries to a Neumann condition, 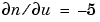 . This means that the solution has a slope of -5 in the normal direction for these boundary segments.
In the Boundary Condition dialog box, select the Neumann condition type, and enter -5 in the edit box for the boundary condition parameter g. To define a pure Neumann condition, leave the q parameter at its default value, 0. When you click the OK button, notice how the selected boundary segments change to blue to indicate Neumann boundary condition.
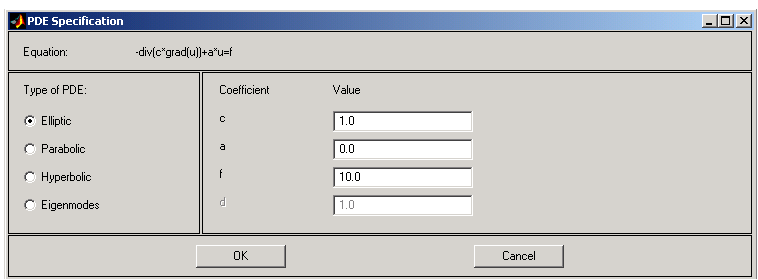
Next, specify the PDE itself through a dialog box that is accessed by clicking the button with the PDE icon or by selecting PDE Specification. . . from the PDE pull-down menu. In the PDE mode, you can also access the PDE Specification dialog box by double-clicking a subdomain. That way, different subdomains can have different PDE coefficient values. This problem, however, consists of only one subdomain.
In the dialog box, you can select the type of PDE (elliptic, parabolic, hyperbolic, or eigenmodes) and define the applicable coefficients depending on the PDE type. This problem consists of an elliptic PDE defined by the equation

with c = 1.0, a = 0.0, and f = 10.0
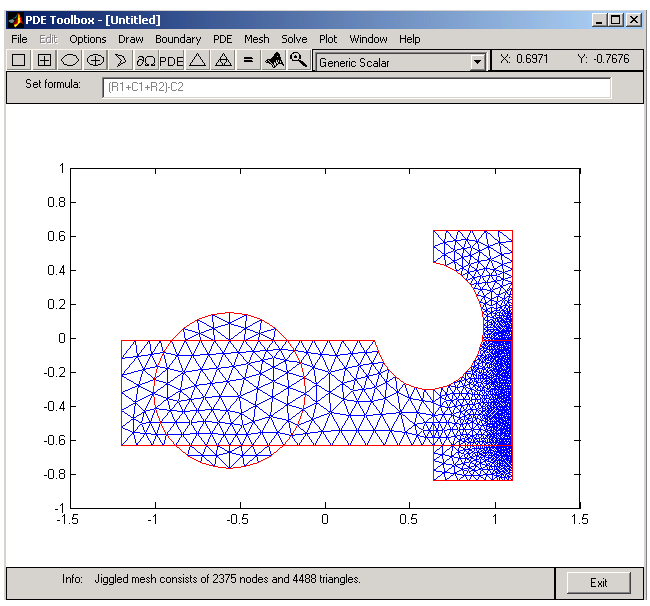
Finally, create the triangular mesh that the PDE Toolbox uses in the Finite Element Method (FEM) to solve the PDE. The triangular mesh is created and displayed when clicking the button with the  icon or by selecting the Mesh menu option Initialize Mesh. If you want a more accurate solution, the mesh can be successively refined by clicking the button with the four triangle icon (the Refine button) or by selecting the Refine Mesh option from the Mesh menu.
Using the Jiggle Mesh option, the mesh can be jiggled to improve the triangle quality. Parameters for controlling the jiggling of the mesh, the refinement method, and other mesh generation parameters can be found in a dialog box that is opened by selecting Parameters from the Mesh menu. You can undo any change to the mesh by selecting the Mesh menu option Undo Mesh Change.
Initialize the mesh, then refine it once and finally jiggle it once.
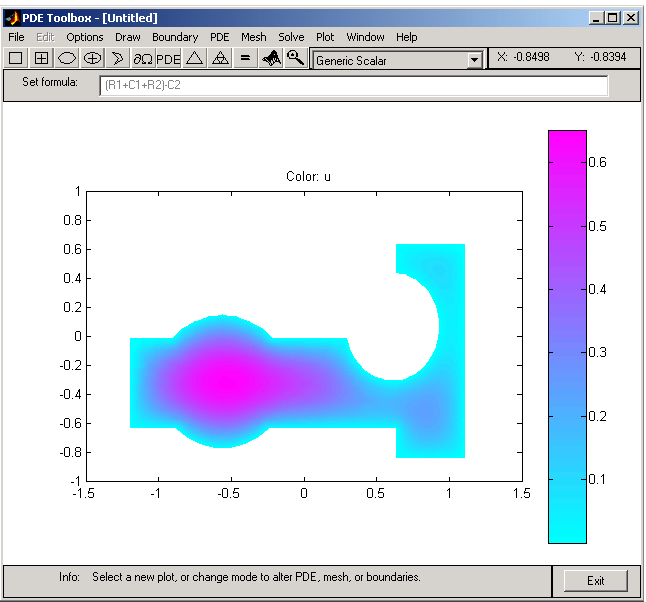
We are now ready to solve the problem. Click the = button or select Solve PDE from the Solve menu to solve the PDE. The solution is then plotted. By default, the plot uses interpolated coloring and a linear color map. A colorbar is also provided to map the different shades to the numerical values of the solution. If you want, the solution can be exported as a vector to the MATLAB main workspace.
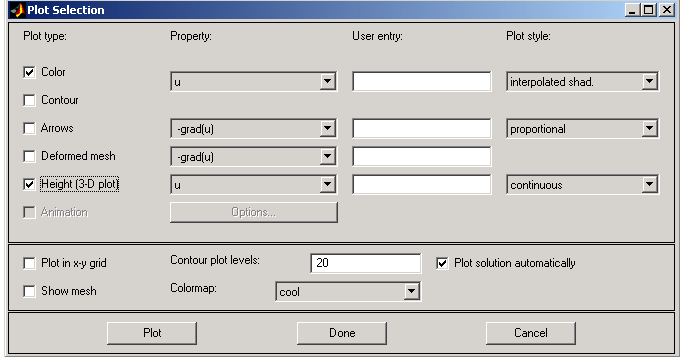
There are many more plot modes available to help you visualize the solution. Click the button with the 3-D solution icon or select Parameters. . . from the Plot menu to access the dialog box for selection of the different plot options. Several plot styles are available, and the solution can be plotted in the GUI or in a separate figure as a 3-D plot.
Now, select a plot where the color and the height both represent u. Choose interpolated shading and use the continuous (interpolated) height option. The default colormap is the cool colormap; a pop-up menu lets you select from a number of different colormaps. Finally, click the Plot button to plot the solution; click the Done button to save the plot setup as the current default. The solution is plotted as a 3-D plot in a separate figure window.
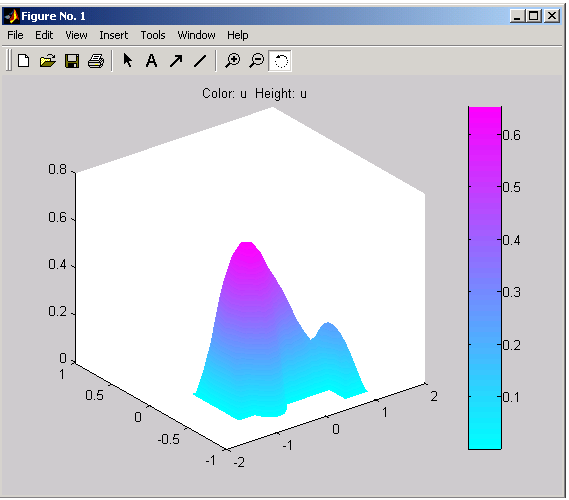
The following solution plot is the result. You can use the mouse to rotate the plot in 3-D. By clicking-and-dragging the axes, the angle from which the solution is viewed can be changed.
This concludes the first example of solving a PDE by using the pdetool GUI. Many more examples in Examples, focus on solving particular problems involving different kinds of PDEs, geometries and boundary conditions and covering a range of different applications.
| | Are There Any Applications Already Implemented? | Basics of the Finite Element Method | |