| Model Browser User's Guide | |
Verifying the Local Model
The first step is to check that the local models agree well with the data.
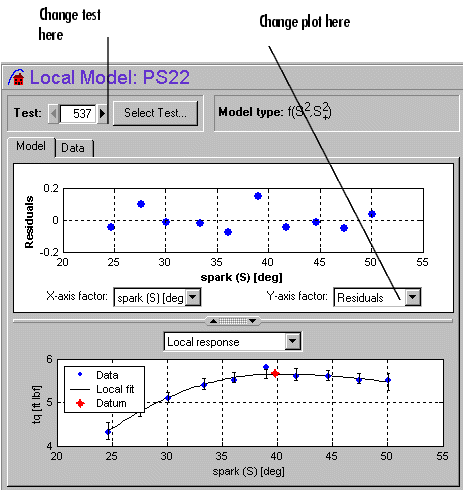
The lower plot shows the data being fitted by the model (blue dots) and the model itself (line). The red spot shows the position of the polyspline knot, at the datum (maximum) point.
Both plots have right-click pop-up menus offering various options such as removing and restoring outliers and confidence intervals. Clicking any data point marks it in red as an outlier.
You can use the Test Notes pane to record information on particular tests. Each test has its own notes pane. Data points with notes recorded against them are colored in the global model plots, and you can choose the color using the Test Number Color button in the Test Notes pane.
| | Specifying the Response Model | Verifying the Global Model | |