Model Browser User's Guide    
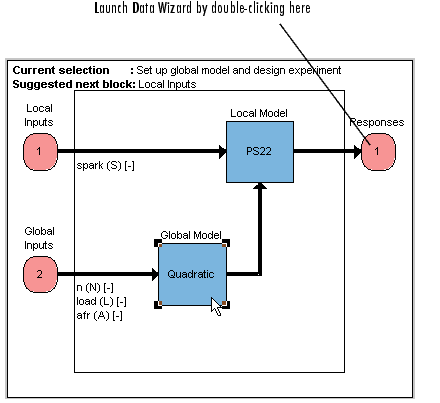
Selecting Data

The model you have set up now needs data.

  1. Double-click the Responses block in the Test Plan diagram. As no data has yet been selected for this test plan, this launches the Data Wizard.

  1. For the same result, you could also click the Select Data button in the toolbar of the model browser (or TestPlan -> Select Data menu item). Also, if you did not already load a data set at the project node, you can do it at this point using TestPlan -> Load New Data.

    The Data Wizard dialog appears.

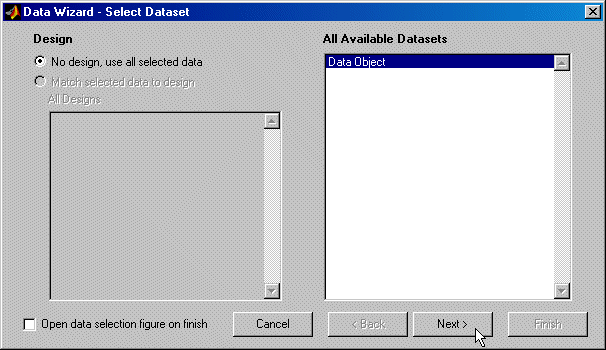
  1. Data Object is already selected by default. Click Next.
  2. Select 
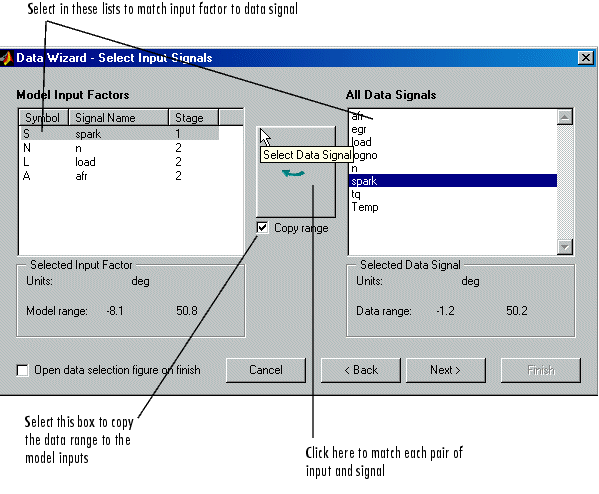
S in the Model Input Factors box and Spark under All Data Signals.
  3. Select the Copy Range check box, as shown. This makes the model use the range in the data for that factor.

  4. Click the large Select Data Signal button, as indicated above.
  5. Repeat this process and match the correct data signals to the other three input factors, N, L, and A (from n, load, and afr).
  1. If the signal name entered during the input factor setup matches a signal name in the data set, the Wizard automatically selects the correct signal when the input factor is selected. If the name is not correct, you must select the correct signal manually by clicking. This autoselect facility can save time if the data set has a large number of signals.

  1. When you have matched all four input factors to the correct data signals (for both stages of the two-stage model), click Next.

  Setting Up the Global Model Specifying the Response Model