| Dials & Gauges Blockset | |
Associating the Main Model with the Gauges
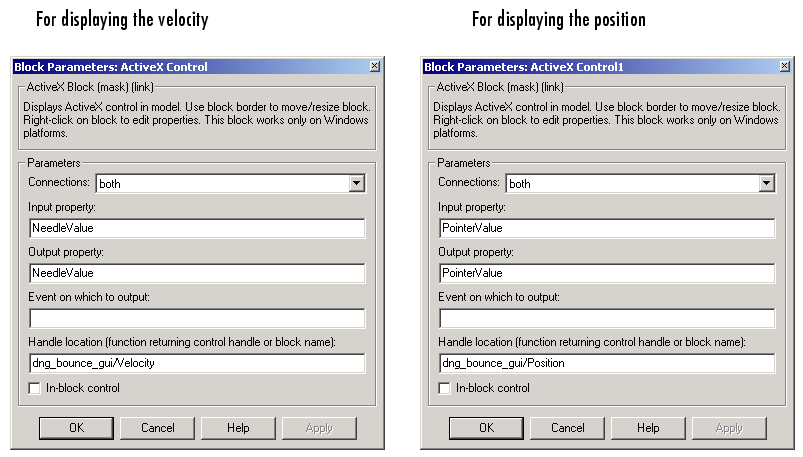
Open the original bounce model and save it in your working directory as dng_bounce. Insert two ActiveX Control blocks on the signals that feed into the Scope block. To connect the ActiveX Control blocks to the controls, make these changes in the Block Parameters dialog box in each of the ActiveX Control blocks:
NeedleValue for the velocity display and PointerValue property for the position display. This property controls the current values of these ActiveX gauges. Doing this passes the value of the input signal to this property.
dng_bounce_gui.
The dialog boxes should look like those in the figure below. Now, when you simulate the main model window, the gauges in the auxiliary model window reflect the velocity and position of the bouncing ball.
| | Creating a Model Window Containing Gauges | Placing ActiveX Controls in a Subsystem | |